Claiming
Contents
Claiming on FTB Revelations, Enigmatica 2: Expert, and StoneBlock 2
On these servers the protected plots of land where players build are called "claims". A claim is a predefined area in the world, assigned to a player, that is protected from breaking/placing of blocks by other players or by the environment.
FTBUtilities Claiming & Chunkloading Map
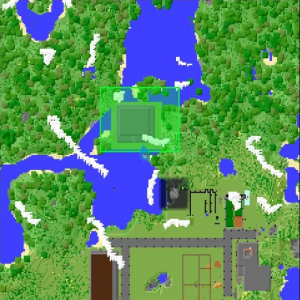
To get started with claiming your own piece of land, open your inventory (keybound to E by default) and click this icon in the top-left corner of your screen: ![]() . A map of your surrounding shall open.
. A map of your surrounding shall open.
On this map, simply click on the chunks that you want to claim for yourself.
In order to chunkload your claimed chunks, shift-click the area that you want to be chunkloaded. The blue border that your claimed chunks have will turn red, signaling that you have started chunkloading that specific chunk. Keep in mind that you can only keep loaded the chunks that you claim.
To learn more about chunkloading, please visit the official wiki page of FTBUtilities.
Claiming on Tekkit Lite, and Gregtech: New Horizons
On these servers we use a land protection plugin called GriefPrevention instead of FTB Utilities. You can use /kit claim to get the required items. We do this primarily to allow us to have more fine grained control over both permissions in different parts of the world and over how much land any player can protect.
Video
Some players may prefer to learn land claiming from a video. As such, the author of GriefPrevention has created a video to show how claiming works. Pleas be aware, however, that this video is not specific to MMCC and some minor details may be different.
https://www.youtube.com/watch?v=VDsjXB-BaE0
Claims
On these servers, all protected land is organized into "claims." Each claim is a rectangle in the world owned by a player in which other players and the environment are restricted from building or breaking any blocks.
Chest Claims
The first type of claim available in GriefPrevention is a chest claim. A chest claim will be automatically created around your first chest when you place it down. It should be noted that this may not work with modded chests. To create another chest claim first delete your first claim by typing /abandonclaim while inside it (this will work for "Other Claims" as well) then place a new chest somewhere else.
Other Claims
All chest claims have a fixed size and you may only have one chest claim at a time. As such, most players will want to create more, larger claims. To do this, follow these steps:
1. Run /kit claim to get a golden shovel and a stick. You may also craft them. You should not expand outside your chest claim until you have a golden shovel.
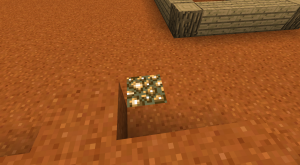
2. With the golden shovel in your hand, right click one of the corners of your desired area. You should get a confirmation in chat and in the world that you did so.
3. Right click, with the shovel in your hand, on the opposite corner of your area. Be careful to not switch away from the shovel in your hotbar while you are doing this, as doing so will restart the claiming process.
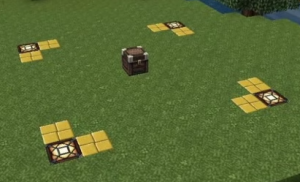
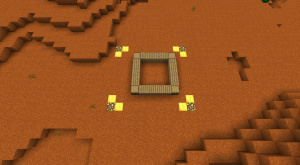
4. You should get a confirmation in chat that now you have set a protected area! Your protected area will be surrounded by gold and glowstone blocks (right-click with a stick outside your claim to make these disappear)
Worldedit CUI
It is possible to use the WorldEdit CUI mod to see claims in-game. Details are at Minecraft Port Central.
Trusting
You may at some point decide that you want to allow other players to access one or more of your claims. With GriefPrevention, you have several different levels of permission that you can apply separately to different claims (you can even apply them separately within the same claim via subdivisions, but that is outside the scope of this tutorial). To add a player to your claim, simply type /trust <playername> while standing in that claim. Replace <playername> with "public" (without quotes) to give everyone access to your claim. You may also use any of the below commands to provide different levels of trust either to individual players or the public:
| Trust Commands | |
|---|---|
| /trust <player> | Allows full access to your claim except for the ability to /trust more players. |
| /accesstrust <player> | Allows the specified player access to buttons, levers, etc. but not machines or chests. |
| /containertrust <player> | Allows full access to containers (ie. machines, chests) along with the access provided via /accesstrust but not the ability to break or place blocks. |
| /permissiontrust <player> | Allows the permissiontrusted player to trust other players in your claim up to the trust level that they have. |
| /trustlist | Provides a list of all of the trust information for the claim you are currently standing in |
| /untrust <player> | Removes the provided player from your current claim. |
Note: Claims are defined as 2-dimensional areas (meaning the area you claim will protect everything between Y=0 and Y=256), so you only need to set two corners.


